Amazing Fireworks – Tips & Tricks for Fantastic Photos

‘Tis the season for festivals, summer events, outdoor concerts & breathtaking fireworks displays that go hand-in-hand with summer nights. While those are all awesomely fun, my favorite part is capturing amazing photos of the fireworks.

When researching how to take the best photos of fireworks you’ll find information about taking them with a point-and-shoot style camera or your phone (where most people suggest using the “Fireworks” mode that is likely one of the built-in settings), but if you’re looking to step up your game a bit and happen to have a D-SLR, that’s when the fun truly begins!

Fireworks Tips & Tricks | theinspiredparent.com

First of all, if you have a D-SLR, for all that is good in the world, do not shoot on Auto. If you haven’t already done so, take a basic photography class so you can learn how your camera works & what the settings mean. A lot of people think “hey, I have a nice camera so now I can take nice pictures.” Even the nicest cameras can produce crappy pictures if you rely on the Auto setting and act as if it’s just a fancy point-and-shoot camera. Learning your equipment and some photography basics will greatly improve your images and that is the ultimate starting point. If you’re going to spend thousands of dollars on a nice camera body and solid lenses, then be sure to invest in a few classes! You’ll be so happy that you did!

Off my soapbox and on to shooting fireworks!

Loved having the outlines of the people in the shot - adds an extra bit of visual interest!
Loved having the outlines of the people in the shot – adds an extra bit of visual interest!

Fireworks - Photography Tips & Tricks | theinspiredparent.com

Many of the guides you’ll find online suggest using a tripod, shooting with a low ISO of 200 or so, with an aperture ranging between f/8 to f/11 and using a longer exposure time of a second or two. Shots using that method will give you some lovely blurring effects. That said, there are times when I don’t want to haul my tripod along (or certain venues where they aren’t allowed) and other times where I want to stop the action without as much blur, depending on the style of shot I wish to produce.

Without using a tripod you can still get stunning shots of fireworks by holding your D-SLR in hand, as long as you tweak a few things in camera and then tweak a few more simple things during post-processing.

The Basics:
Several details come into play as far as the settings to use — how much ambient light is nearby, how close you are to the action, what camera body you’re using and which lens. You’ll need to do some instant fine-tuning during any fireworks show, so it is vital that you know your equipment and understand your settings. For years, I’ve shot in Manual for everything, as well as in RAW format. That gives me the most control over what I’m shooting and the way I handle noise reduction and other levels during post-processing. Since I shoot RAW, I generally keep my white balance on auto since I can always tweak things in post.

Using examples from the last two years of some images I captured on the 4th of July (two different locations), all were shot without a tripod by handholding a Nikon D600 using either a Nikkor 50mm f/1.4G lens or a Nikkor 17-35mm f/2.8D lens.

My ISO for all of the shots ranged from 2000 to 6400 with most at 6400. For the super bright shots at the end of the shows where a gazillion fireworks were being blown off at once, I would lower my ISO or adjust my aperture or shutter speed. I typically kept my aperture between f/4.5 to f/5.6 with my shutter speed around 1/100 of a second. This stopped some of the action but left slight blurring at times, and gave me the effect I was looking for based on my style of shooting.

Amazing Fireworks - Photography Tips | theinspiredparent.com

General Composition & Focus:
I used a combination of auto-focus and manual focus, depending on the situation. Some of my favorite shots ended up having the outlines of the audience in the frame — I liked the extra bit of visual interest. For those particular images, the people were seated on a slight hill, maybe 6-8 feet higher than where I was sitting. For most of those shots, I was shooting horizontally to capture the people on the hill. For some of the others, I shot vertically to capture the fireworks that were exploding a bit higher in the sky.

Amazing Fireworks - Photography Tips | theinspiredparent.com

Amazing Fireworks - Photography Tips | theinspiredparent.com

Post-Processing:
After downloading these particular photos, I handled my RAW processing in Lightroom to take care of my noise reduction, tweaking the sliders for blacks & shadows (making them a hair darker) and on a few of the bright ones, very lightly tweaking the sliders for whites & highlights. After that, I exported the shots to Photoshop to do any minor levels work & to perfect the sharpening on those I planned to print. Ultimately, these were very minimally processed — no major bells and whistles as I did my best to get everything as close to perfect in-camera.

Final Reminders & Tips:
1. This may seem obvious, but make sure your batteries are charged and you have lots of room on your memory card(s). The luxury of digital photography is that you can shoot a gazillion images and easily delete the not-so-great ones (which would be quite expensive if you were shooting tons of shots & paying for the film to be developed, only to have a few keepers).

2. Know your equipment. Whether point-and-shoot or D-SLR, learn your equipment so you know how to quickly change your settings on-the-fly. You don’t want to miss the action by staring at your camera trying to figure out how to tweak things. This takes time — be patient with yourself, take a photography class (or three) and keep at it. Eventually you’ll be changing those camera settings on what feels like auto-pilot.

3. If shooting fireworks without a tripod, try to keep your shutter speed around 1/100 to avoid camera shake (yes, there are caveats to this rule, but this speed seems to be safe speed for most people).

4. Most importantly: practice, practice, practice! When you’re done with that — practice some more! Play with your settings and have fun!

One of my favorite photos I've taken of fireworks - shot at the Taste of Oak Brook in Oak Brook, IL.
One of my favorite photos I’ve taken of fireworks – shot at the Taste of Oak Brook in Oak Brook, IL.

Article updated July 2017

Simple Fennel & Orange Salad

This is one of the easiest salads to whip up — the perfect light side dish when paired with grilled or baked seafood or poultry and travels well as a make-ahead for a potluck brunch. Light, crisp, refreshing & with only two main ingredients — so simple!

Fennel & Orange Salad | theinspiredparent.com

[amd-zlrecipe-recipe:12]

We like to reserve fennel fronds to use as garnish.

Enjoy!

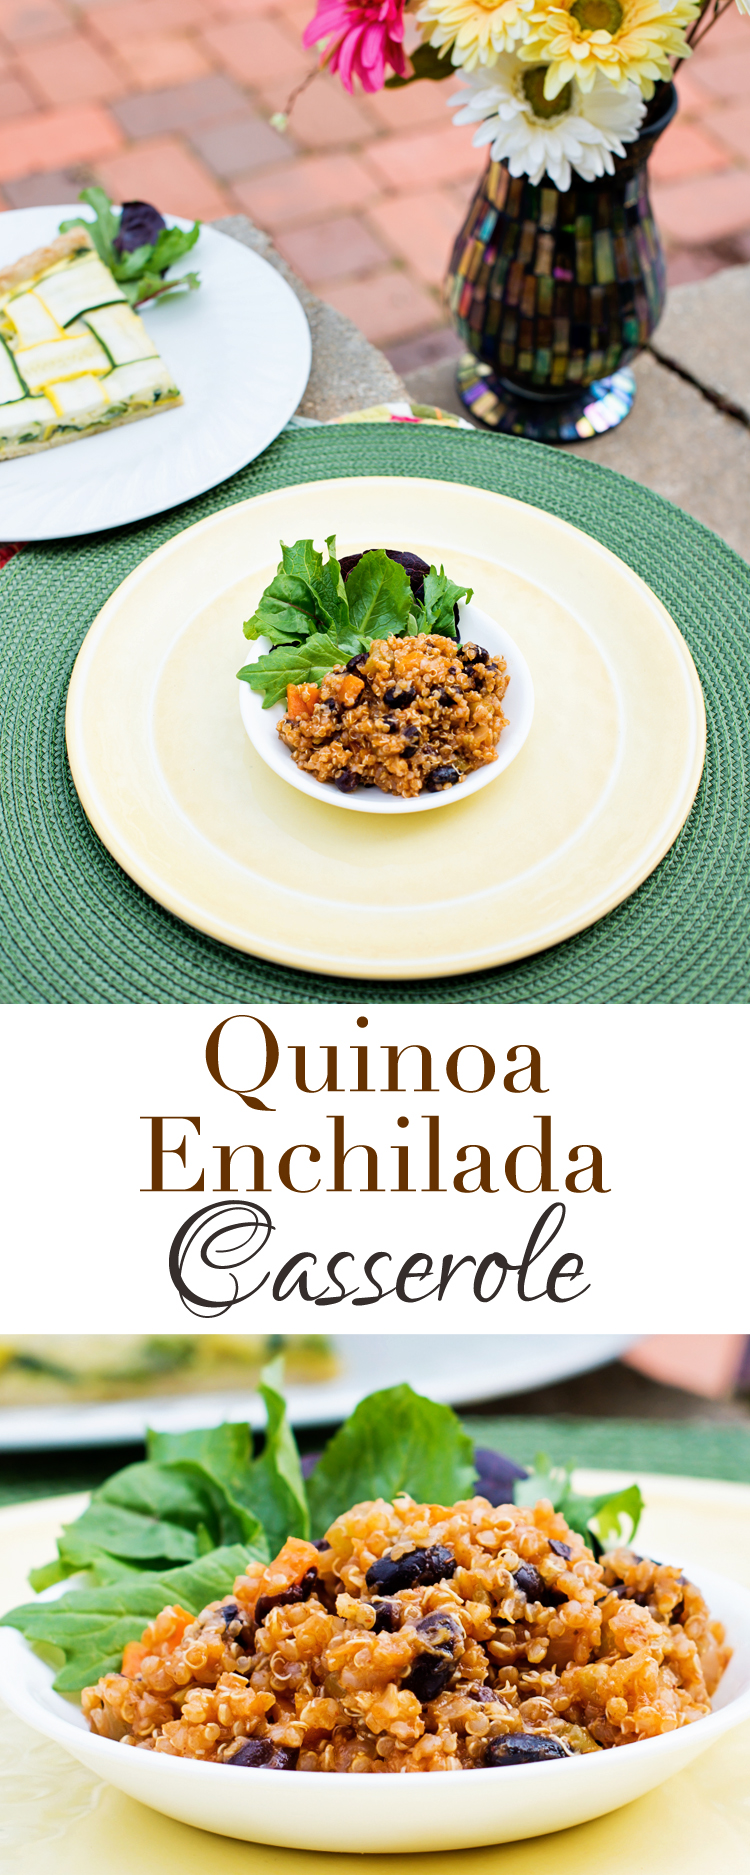
Quinoa Enchilada Casserole

We love quinoa. This gluten-free, ancient superfood has been a staple in our home for several years — it’s a great substitute for pasta, rice or couscous. Mild in flavor, this extremely versatile grain pairs beautifully with all sorts of flavor combinations.

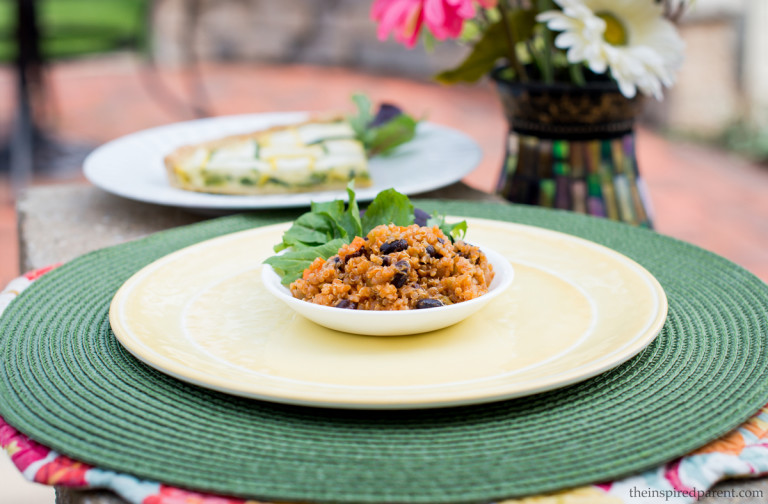
Quinoa Enchilada Casserole | theinspiredparent.com

We’ve made quinoa bowls for quite some time (black beans, quinoa, veggies, etc.) and decided to give it a try using enchilada sauce to change things up a bit. Added some of our favorite cheese sprinkled on top & baked it & our Quinoa Enchilada Casserole was born! We’ve cooked it at least once a month ever since. It’s a great dish if you’re feeling like comfort foods — keeps you filled up, reheats beautifully and is just as tasty at room temperature as it is piping hot out of the oven, so it’s great for a party if you’re serving buffet-style.

Best part is that you could easily change things up…maybe try a different bean combination, add some other veggies, make it spicy or keep it mild. The options are only as limited as your culinary imagination. Any which way, this is just one tiny sample of how scrumptious quinoa can be. Happy eating!

Quinoa Enchilada Casserole | theinspiredparent.com

Enjoy!

[amd-zlrecipe-recipe:15]

Originally published April 2016.

Colorful Containing

Hooray! Happy Spring Equinox! As much as we truly adore winter (toasty sweaters, hot cocoa, skiing, sledding, cozy family time, comfort foods, etc., etc., etc.)…once spring arrives & the weather starts to change, it is so exciting to see the little baby plants sprout up with promises of a new, colorful season!


Colorful Containing | theinspiredparent.com


I’m no longer squeamish about getting my hands in the dirt (though I had better call it “soil” or one of my sisters-in-law will likely correct me). 🙂 In fact, I truly do love getting out there and planting new things — it’s relaxing and peaceful. Growing something from seed or even from a baby starter plant from the garden center and watching it thrive is quite cool & there’s a great sense of accomplishment when you sit out on your patio surrounded by pretty plants.

My first gardening project involved creating colorful containers when we moved into our house about 12 years ago. Containers seemed much less intimidating and fell into the “instant gratification” category for me — I was NOT a gardener in any way, shape or form back then.

At first we grew a lot of annuals — they were easy & having their showy flowers on our front porch reminded me of the gorgeous flower carts in New York City or at the farmer’s markets in Europe. Over the years, we started taking advantage of the southern exposure our front porch receives to grow herbs with a few full-sun flowers tucked in for a bit of color. As we expanded our garden, we started keeping various containers of herbs & veggies, mixed with flowers, surrounding our raised bed in the backyard near our patio.

TIP: Try repeating elements throughout your yard or in a couple of containers. Though we tend to gravitate toward a cottage garden atmosphere where we mix and match plants in a slightly whimsical fashion, it’s fun seeing the same red (or yellow or pink) flowers popping up in a few different spots throughout the yard to tie things together for a sense of cohesiveness.

As for herbs — oh how we love them! Nothing beats clipping some fresh herbs you’ve grown yourself for whatever culinary delight you happen to be making for dinner! We’ve tried lots of different herbs — most work really well for us — though for some weird reason, we haven’t ever had much luck with growing cilantro. Other than that, we have some favorites that we end up growing each year. Some have even survived our harsh winters & surprise us when they appear again the next spring — love when that happens since it means fewer new plants to buy or start over from seed.

We keep our chives in a container that can remain outdoors over the winter & every year, it is one of the first plants to start popping up in the spring. The other one we’ve actually had survive is rosemary. That one really surprises us since it shouldn’t be able to withstand our bitter Chicago winters. We have had luck with some rosemary plants that survive two or three years before we need to buy a new one.

After trying out many different herbs, the favorites we seem to grow each and every year include:

  • Basil, basil & more basil so we can make tons of pesto
  • Rosemary
  • Thyme
  • Lemon Thyme
  • Chives
  • Dill
  • Parsley
  • Sage
  • Mint (different varieties)
  • Lavender

TIP: When filling a container with different plants & herbs, make sure that the required soil conditions are similar for each of the plants…you don’t want to plant something that prefers dry soil with something that needs lots of watering. Thankfully, containers are quite easy to re-do if you find that you need to move things around a bit by mid-season if it seems one plant is struggling a bit. The key is to pay attention to your little plant babies each day to see how they’re doing — that way you can fine-tune things if necessary.

TIP: Mint is a tricky one — in most locations, mint can quickly take over your yard or garden since many varieties are quite aggressive. Keeping mint in containers are a wonderful way to enjoy it without worry. We love growing different types to put in our iced tea in the summertime!


Bi-colored sage, a lovely variety of rosemary and some pretty annuals tucked in for color.


Quite possibly my favorites, gerbera daisies are such happy little flowers! We’ve had great success planting these in containers – they’re a great element to repeat in other parts of the garden as well.


Another fun thing we’ve done for the last few years is to help our little one plant a fairy garden. You can find miniature versions of different plants at your local garden center as well as little decorative items. Though we call ours a “fairy” garden as they do in the garden centers, ours is quite light on the fairy aspect…our little one isn’t into fairies & princesses, but she adores animals so she usually finds a few new animals and miniature items at the start of each season. We give her a budget on what she can spend & she picks the plants she’d like to try & decides where to place them in her special containers before we help her plant them. This last year she picked up some new birds, a raccoon, a frog & a koi pond as well as a couple of pretty stones with little painted butterflies. She loves to help us water the plants and gets such a kick out of seeing her mini-garden grow throughout the year!

A few of these plants will come back year-to-year in our climate…the stonecrop has been in this container for about four or five years. We divide it and plant it in other containers each spring since it does so well for us.

TIP: If you have small decorative items in your containers & you live in a colder climate, make sure to remove those decorations in the fall…if you gently clean them & store them indoors, they will likely last many years!


Planting a special fairy or animal garden is such a great project for kids – continual learning throughout the season as the plants grow as well as added responsibility for even the littlest ones who can help out by watering & caring for the plants!


Have you ever planted lettuce? We started growing lettuce about six years ago. Perfect for spring & fall planting, you’ll get an abundance of gorgeous, tasty greens while the weather is cooler. Different varieties have worked well for us in containers or in our raised bed. This is another one our little one really enjoys — it grows very quickly & she loves salad so it’s a great plant that she can help harvest all by herself.

As for mulch, we absolutely adore using cocoa mulch in our containers & in the beds near our patio. It does a great job keeping the weeds at bay and the lovely cocoa scent is fantastic!


Two lettuce varieties we planted last year – both were tender & sweet. The cocoa mulch not only smells wonderful, but is pretty, too!


Our raised bed in May. We keep some of our containers along the raised bed – adds a great spot of color at the edge of our patio.


A few years ago after our patio installation was complete, we added the raised bed as a spot to grow tomatoes & beans. After using it a season or two, we now use it for different lettuces on one side, a determinate cherry tomato plant in the center of the bed (stays compact) and we’re going to continue putting extra basil plants on the other side. We surrounded the raised bed with some of our pretty containers and it’s a lovely, colorful little side area when you’re out on the patio. It is also very easy to access any of the items we wish to harvest.

If you haven’t tried container gardening yet, give it a try this year! You really don’t need much space & containers are the perfect stepping stone into the world of gardening! Just note that while some containers can be kept outdoors all year, if you live in a cooler climate, make sure to clean & store any ceramic pots indoors — they can break if kept outside over the winter.

If you do keep a container garden, what are some of your favorite things to plant or some of your favorite plant combinations? We’d love to hear about it! Drop us a note in the comments below!

HAPPY GARDENING!